Three Ways to Sew Elastic Waistbands Tutorial
Elastic waistbands are a staple in the garment industry, offering unmatched comfort and flexibility for wearers. There are various elastic styles available for sewing, such as braided, woven, and knit elastic, each suitable for different applications like waistbands. Whether you’re manufacturing activewear, playwear, or formal attire, mastering the art of sewing elastic waistbands is essential for garment wholesalers and textile traders aiming to deliver products that balance style, function, and fit. This tutorial will walk you through three effective techniques for sewing elastic waistbands—casing, direct application, and shirring—and provide valuable tips to elevate your production process.
Understanding Elastic Waistbands
Elastic waistbands are a type of waistband finish that uses elastic for a comfortable and stretchy fit. They are commonly used in garments such as skirts, pants, and dresses, providing both comfort and flexibility. This makes them a popular choice for many sewists, whether they are working on casual wear or more formal attire.
There are two main categories of elastic waistbands: fold-down casings and applied casings. Fold-down casings involve folding the fabric over the elastic to create a neat, enclosed finish. Applied casings, on the other hand, involve sewing a separate piece of fabric to encase the elastic. A third category involves sewing elastic directly to the fabric, which is often used with knit fabrics for a sleek and seamless look.
Understanding these different methods allows sewists to choose the best technique for their specific project, ensuring that the finished garment is both comfortable and stylish. Whether you are working with knit or woven fabrics, mastering these techniques will enhance your sewing skills and expand your garment-making possibilities.
Why Elastic Waistbands Matter in the Garment Industry
The elastic waistband is more than just a functional element; it’s a critical design component that ensures garments fit a wide range of body types while maintaining comfort and ease of wear. Neatly finishing the waist edge of garments is crucial, and methods for attaching elastic should emphasize the relationship between the elastic and the waist edge during construction. This versatility has made elastic waistbands an indispensable feature in categories like athleisurewear, childrenswear, maternity apparel, and more. When done correctly, sewing elastic waistbands ensures durability in design while optimizing production time, making them a win for consumers and manufacturers alike.
Materials and Tools Needed
To create an elastic waistband, you will need the following materials and tools:
-
Fabric of choice (e.g., cotton, linen, or knit fabric)
-
Matching sewing thread
-
Ruler
-
Pen
-
Scissors
-
Pins
-
Chalk
-
Sewing gauge
-
Fabric marker
-
Safety pin
-
Needle
-
Sewing machine
-
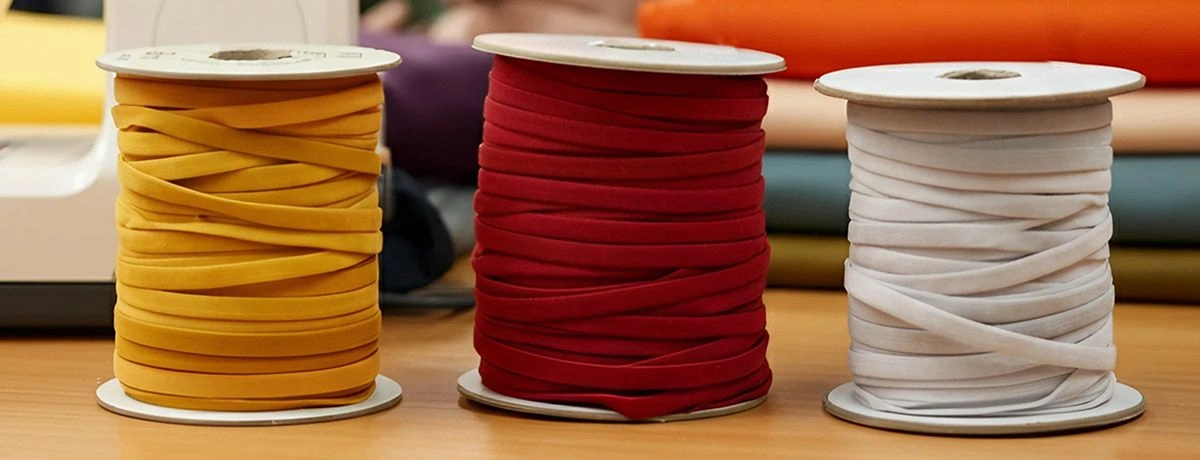
Elastic (available in various widths, textures, and colors, such as braided elastic, knit elastic, or woven elastic)
When choosing elastic for your waistband, consider the type of fabric you are using and the desired level of stretch. Braided elastic is suitable for use in a casing, while knit and woven elastics can be sewn through directly. Non-roll elastics are designed to prevent waistbands from rolling down, and specialty elastics are available for specific sewing needs, such as swimwear or maternity garments.
It’s also important to consider the width of the elastic, as it will affect the comfort and fit of the garment. A wider elastic will provide more comfort and support, while a narrower elastic may be more suitable for a more fitted garment. Additionally, consider the color and texture of the elastic, as it will be visible on the outside of the garment.
When sewing an elastic waistband, it’s essential to use a sewing machine and a safety pin to ensure a secure and even stitch. The seam allowances should be topstitched down onto the elastic to prevent fraying and ensure a professional finish. The elastic should be stretched to fit the garment, and the edges should be pinned in place before sewing to ensure a smooth and even finish.
By gathering the right materials and tools, and understanding the different types of elastic, you can create comfortable and stylish elastic waistbands for any garment.
Three Techniques to Sew Elastic Waistbands
1. Casing Method
The casing method involves creating a fabric tunnel or "casing" through which the elastic band is threaded.
Steps:
-
Cut Fabric and Elastic:
Measure and cut the elastic band for the waist based on the garment size. Remember to leave a small overlap for securing.
-
Prepare the Casing:
Fold over the edge of the fabric to form a tunnel slightly wider than the elastic band. Iron it to ensure a clean edge.
-
Sew the Casing:
Sew along the edge, leaving a small opening to insert the elastic.
-
Insert the Elastic:
Use a safety pin or elastic threader to guide the elastic through the casing.
-
Secure and Close:
Overlap the ends of the elastic and sew them together, then close the opening in the casing.
Best For:
This technique is ideal for casual wear, pajama bottoms, or skirts requiring an adjustable fit.
Industry Example:
A local children's wear manufacturer found the casing method particularly beneficial for their playwear line, as it allows for adjustable fits, minimizing the need for multiple size variations.
2. Direct Application Method
The direct application method attaches the elastic band directly to the fabric without a casing, resulting in a sleeker finish.
Steps:
-
Cut Fabric and Elastic:
Measure the elastic band to fit the waist snugly, cutting slightly shorter than the fabric's waistline.
-
Mark and Pin:
Divide both the fabric and elastic into equal sections (quarters) and mark them.
-
Stretch and Sew:
Align the elastic with the fabric at the markings, pin in place, and stretch the elastic as you sew to evenly distribute the tension.
-
Secure Hem:
Fold the fabric once over the elastic and finish with a topstitch.
Best For:
This technique works well for leggings, activewear, and items requiring a flexible yet sleek fit.
Industry Example:
By adopting the direct application technique, a boutique increased production speed by 30%, paving the way for reduced labor costs and improved efficiency in sportswear manufacturing.
3. Shirring Technique
Shirring involves sewing rows of elastic thread directly onto the fabric, creating a gathered, stretchy effect.
Steps:
-
Wind Elastic Thread:
Manually wind elastic thread around your bobbin, keeping it taut.
-
Set the Machine:
Thread the top thread as usual, and set your sewing machine to a longer stitch length for flexibility.
-
Sew Rows:
Sew parallel rows of stitching across the fabric, ensuring consistent spacing.
-
Steam for Elasticity:
Use steam to shrink and gather the elastic thread for a snug finish.
Best For:
Use this technique for airy summer dresses, blouses, or garments requiring lightweight flexibility.
Industry Example:
A fashion boutique improved customer satisfaction by 20% after introducing shirred elastic waistbands in their dress collection. This flexible approach resulted in better fit options for various body types, enhancing consumer appeal.
Tips for Choosing the Right Elastic and Fabric
Selecting the correct elastic and fabric is critical for achieving optimal results. Here’s what you should consider:
-
Elastic Type:
-
Rubber Waistband Elastic: Best for heavy-duty garments requiring strong stretch and recovery.
-
Spandex Waistband: Ideal for activewear due to its high elasticity and durability.
-
Wide Elastic Waistband: Great for creating a supportive and structured look in skirts or trousers.
-
Fabric Compatibility:
-
Use lightweight fabrics for shirring to allow for maximum stretch and comfort.
-
Opt for non-fraying fabrics like jersey for direct application methods to eliminate complex finishing steps.
-
Heavier fabrics like denim pair well with wide elastic for added structure.
Troubleshooting Common Sewing Problems
Even with the proper tools and techniques, issues may arise when sewing elastic waistbands. Here are common problems and solutions:
Twisted Elastic
-
Problem:
The elastic twists inside the casing during or after stitching.
-
Solution:
Use a wide enough casing, and secure the elastic at multiple points before finalizing the stitching.
Uneven Gathering
-
Problem:
The fabric doesn't gather uniformly along the elastic, creating an unbalanced look.
-
Solution:
Divide both fabric and elastic into equal sections before sewing to ensure even distribution.
Stitch Breakage on Stretch
-
Problem:
The stitches snap when the waistband is stretched.
-
Solution:
Use a zigzag stitch or stretch stitch settings on your sewing machine for added flexibility.
Benefits of Each Technique for Manufacturers and Traders
-
Casing Method:
Offers simple adjustments for different sizes, reducing returns and ensuring a more inclusive product lineup.
-
Direct Application:
Saves on production costs and time, ensuring that manufacturers meet deadlines and demand quicker.
-
Shirring Technique:
Adds a fashionable, high-end look to garments, boosting product value and demand in competitive markets.
Explore More Sewing Insights
Elastic waistbands remain a key component in delivering both functional and fashionable garments across industries. By mastering these sewing techniques, manufacturers and textile traders can enhance production flexibility, improve efficiency, and cater to a diverse clientele.
We’d love to hear about your experience using these methods—share your tips, tricks, or challenges in the comments below. For more expert insights on garment production and the textile market, explore our library of resources or contact us directly.
