How to Sew an Elastic Waistband That Never Twists
Twisted elastic waistbands are a common frustration for both garment manufacturers and wearers. They can lead to irritation, frequent garment adjustments, and even product returns for clothing businesses. However, with the right techniques and materials, this problem can be solved with ease.
This guide will take you through everything you need to know about sewing a non-twist elastic waistband. From choosing the right elastic to troubleshooting common issues, you'll learn practical steps that ensure durability, comfort, and seamless design.
Understanding Elastic Waistbands
Before jumping into the sewing process, it’s important to understand the basics of sewing elastic and waistband elastic.
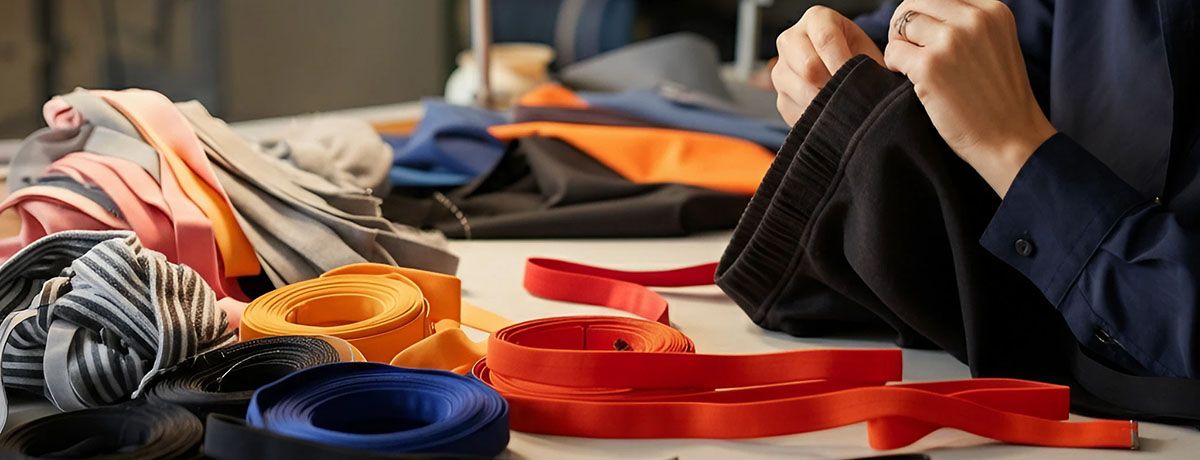
Types of Elastic
Not all elastics are created equal. Selecting the right type of elastic is crucial to achieving a non-twist waistband that supports the garment’s design and purpose. Common types include:
-
Braided Elastic: Lightweight and versatile, suitable for fabrics that do not require heavy support.
-
Woven Elastic: Durable and strong, designed for heavier fabrics and garments like pants or skirts.
-
Knitted Elastic: Soft and more stretchy, perfect for lighter fabrics and comfortable wear.
-
Fold-Over Elastic: Ideal for stretchable apparel like activewear, offering a sleek finish.
-
Knit Elastic: Highly elastic and suitable for various sewing applications such as wigs, waistbands, and pants, making it perfect for DIY crafting.
The choice of elastic depends on the type of fabric used and the purpose of the garment.
Importance of Correct Measurement
Accurate measurements prevent the waistband from bunching or twisting over time. The elastic length should typically be 1–2 inches shorter than the waist measurement for a snug but comfortable fit. Always account for the elastic's stretch properties before cutting.
Choosing the Right Elastic
Making the right choice ensures both functionality and customer satisfaction. Applying elastic directly to the fabric can streamline the construction process and enhance the garment's aesthetic appeal.
Additionally, creating a waistband casing is crucial for sewing elastic waistbands, as it ensures the elastic is inserted neatly and remains untwisted, resulting in a polished finish.
Factors to Consider
-
Fabric Weight: Lightweight fabrics pair well with braided or knitted elastic, while woven elastic is better for heavier fabrics.
-
Durability: For garments expected to last for years, high-quality, durable elastic is essential.
-
Design Style: For skirts and dresses, elastic that maintains aesthetic appeal while providing flexibility is recommended.
Fabric Pairings
For best results, match your elastic to the garment's fabric:
-
Use knitted elastic for soft garments like jersey material.
-
Woven elastic works well with denim or heavy cotton.
-
Fold-over elastic complements delicate fabrics like silk and lace.
Case Study Highlight: A prominent clothing manufacturer adopted wider woven elastic for their pants line and experienced a 20% reduction in returns due to improved waistband stability.
Step-by-Step Guide to Sewing a Non-Twist Elastic Waistband
Now let’s break down the process into actionable steps. Using a sewing machine is crucial for achieving a professional finish on your garments.
First, gather your materials and prepare your fabric. Make sure to use a presser foot to maintain consistent seam allowances while stretching the elastic to fit the fabric.
Step 1: Preparing the Fabric and Elastic
-
Prewash your fabric and elastic to avoid shrinkage post-production.
-
Cut the elastic to size, ensuring the ends are securely joined (overlap by 1 inch and sew a zigzag stitch for strength). Align the elastic's center back marking with the garment's center back seam to ensure an even distribution while applying the elastic.
Step 2: Creating the Casing
-
Fold the top edge of the fabric over to create a casing wide enough to accommodate the elastic comfortably.
-
Press the fold with an iron and pin in place to ensure accuracy. Run a line of stitching around the entire casing to secure the elastic and prevent it from twisting.
Step 3: Securing the Elastic
-
Insert the elastic into the casing using a bodkin or a large safety pin. Secure one end to avoid pulling it through unintentionally.
-
Use a few pins to ensure the elastic is eased in evenly around the waist, matching up seams and notches for a more professional finish. Ensure the elastic lies flat within the casing as you guide it through.
Step 4: Sewing the Waistband
-
Use a zigzag stitch or stretch stitch to sew the casing shut, keeping the elastic perfectly aligned. The waist edge is crucial in ensuring a comfortable fit and a neat finish.
-
For added security, stitch vertically through the fabric and elastic at intervals (e.g., at side seams) to prevent twisting over time.
Case Study Highlight: A small boutique designer adopted this method for skirts, which led to rave reviews for the garment’s polished appearance and comfort.
Step 5: Finishing the Waistband
Finishing the waistband is the final step in creating a professional-looking elastic waistband. This step involves securing the elastic in place, closing the opening, and adding any additional details.
To finish the waistband, follow these steps:
-
Secure the Elastic: Use a zig-zag stitch or a stretch stitch to secure the elastic in place. Make sure to backstitch at the beginning and end of the seam to prevent it from coming undone. This ensures the elastic stays firmly in place, providing a durable finish.
-
Close the Opening: Hand-sew the opening shut using a whipstitch or a blind stitch. Ensure the stitches are secure and won’t come undone with wear. This step is crucial for a neat and polished look.
-
Add Additional Details: If desired, add additional details such as topstitching or a decorative stitch to the waistband. This can add a professional touch and enhance the overall appearance of the garment. Topstitching not only looks good but also helps keep the elastic from shifting.
-
Press the Waistband: Press the waistband to create a crisp fold and to help the elastic lie flat. Use a hot iron and steam to press the waistband, making sure to press the seam allowances to one side. This step ensures a smooth and professional finish.
-
Topstitch the Waistband: Topstitching the waistband can add a professional touch and help to secure the elastic in place. Use a straight stitch or a stretch stitch to topstitch the waistband, making sure to keep the stitches even and consistent. This final touch enhances both the look and functionality of the waistband.
Advanced Tips for Elastic Waistbands
Customizing Widths
For garments requiring extra durability or aesthetic appeal, experiment with varying waistband widths:
-
Narrow waistbands (1/2 inch) for lightweight garments.
-
Wider waistbands (up to 2 inches) for structured, stylish pieces like high-waisted pants.
Sewing for Durability
-
Reinforce the casing with double stitching.
-
Use strong and flexible thread like polyester to maintain stretch.
Comfort vs. Style
Ensure balance by choosing elastic that doesn't compromise on comfort despite adding structure or style, especially for activewear or casualwear.
Troubleshooting Twisted Elastic Waistbands
Even with careful preparation, mistakes can happen. Here’s how to address common issues.
To avoid these problems, it's essential to learn the proper techniques to sew elastic into waistbands, ensuring a neat and professional finish.
Additionally, sewing elastic correctly is crucial to prevent twisting and maintain the comfort and adaptability of the garment.
Preventing Twists During Sewing
-
Regularly check the elastic as you sew to ensure it remains untwisted.
-
Pinning the elastic to the casing at regular intervals helps maintain alignment.
Fixing Twisted Waistbands Post-Sewing
-
Carefully unpick the seam along the casing and realign the elastic. Re-sew to secure.
-
For minor twists, adjust by gently pulling and twisting the fabric until the elastic lies flat.
Testimonial Highlight: A sewing instructor introduced these techniques to her students, who reported excellent results and no twisting in their final projects.
Master the Art of Non-Twist Elastic Waistbands
Creating non-twist elastic waistbands is about mastering a combination of technique and material choice. By following the steps outlined above, manufacturers can improve garment quality, reduce returns, and enhance customer satisfaction.
Start upgrading your production today! Explore our sewing materials and tools section for high-quality elastic, specialized threads, and more resources to support your projects.
Contact MH
MH offers elastic waistbands. Please contact us for more details or inquiries. We're here to help!