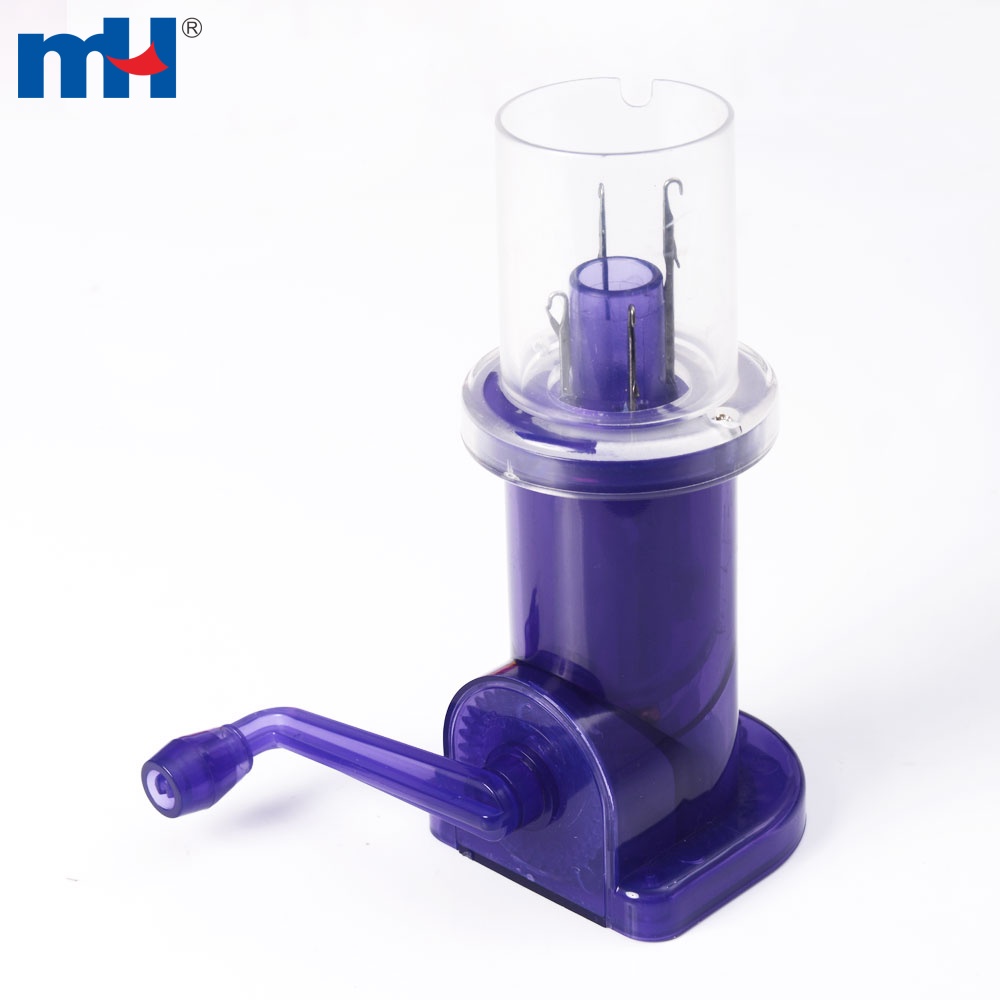
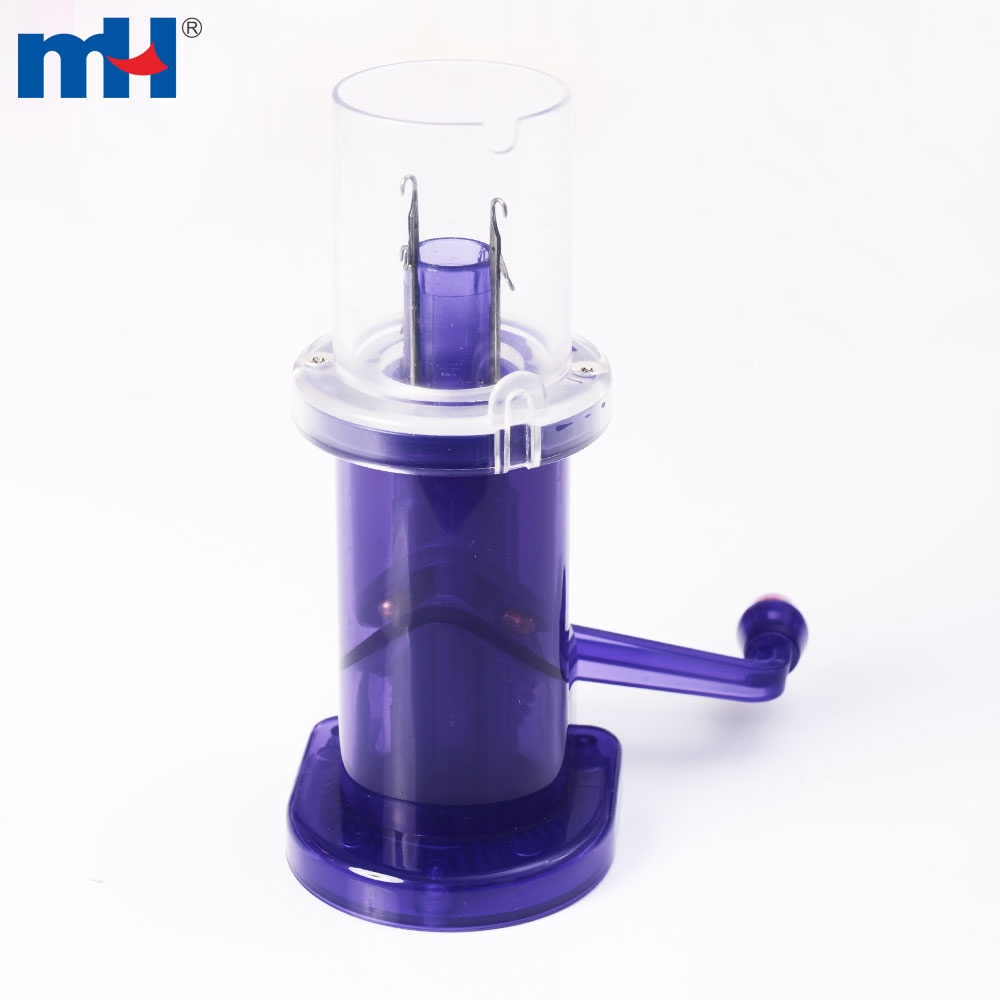
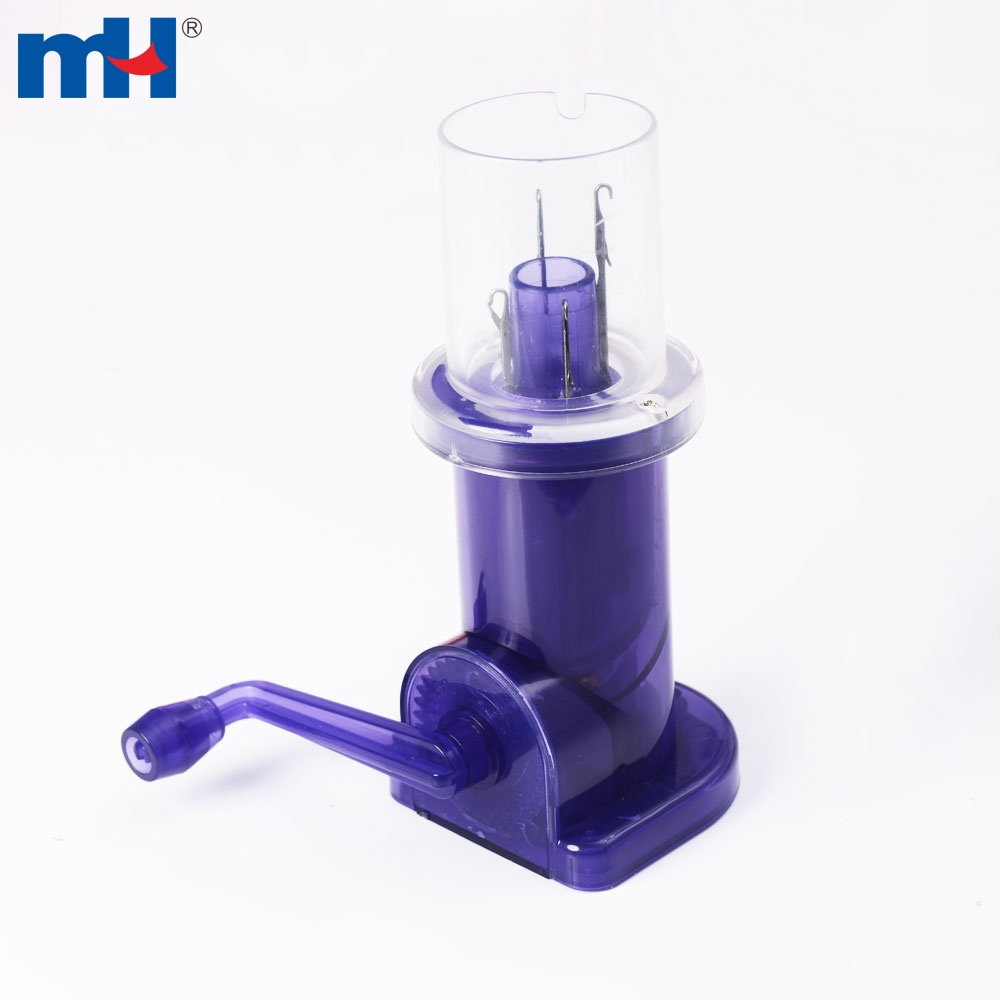
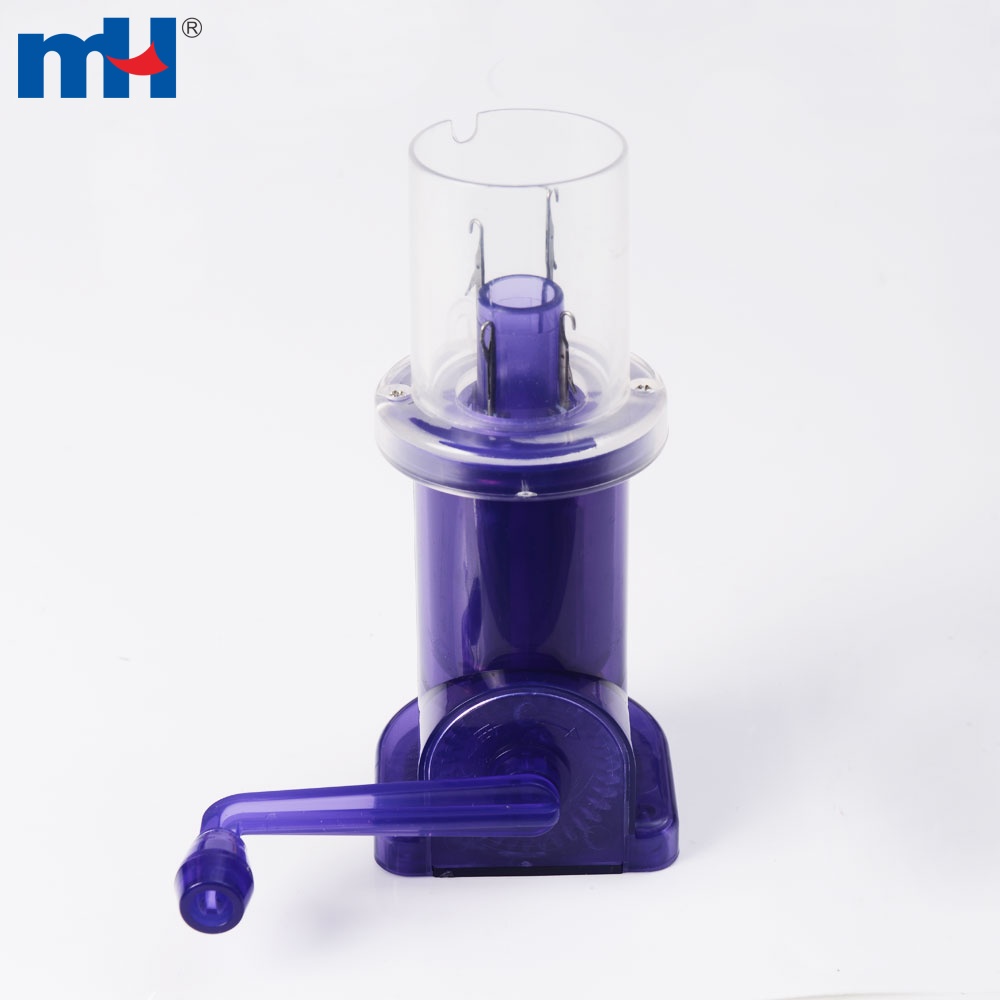
Embellish-knit Hand-Operated Knitting Roll
Embellish-knit


- Model7022-0038
| Material: | Plastic and Steel |
| Color: | Blue |
| Size: | 14*9.5 cm |
| Package Includes: | 1 x Knitting Tool 1 x Clasp 1 x Specification |
Note:
1. Due to the light and screen difference, the item's color may be slightly different from the pictures.
2. Please allow 2-3mm differences due to manual measurement
|
STEP 1 Pull a few lengths of yarn out of the ball. Thread it through the lower guide, over the upper guide and down through the tube. Attach the clip weight to the end of the yarn. Hold the yarn with your hand so it does not fall through the tube Be sure all the needle latches are open. |
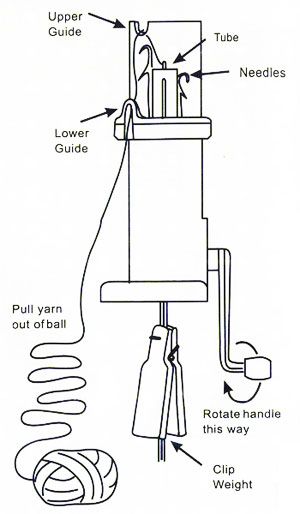 |

TIP: The tapestry needle that comes with your machine is designed so you can push open the latches using the top of the needle |
|
|
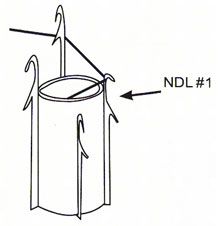
STEP 2 Turn the handle slowly in the direction of the arrow (where the handle attaches to the machine) until the first needle catches the yarn. |
 |
| STEP 3
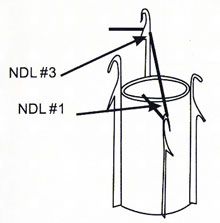
Continue turning the handle slowly. Push the yarn behind the second needle using the top of your tapestry needle. Continue turning the handle until the third needle catches the yarn. |
 |
|
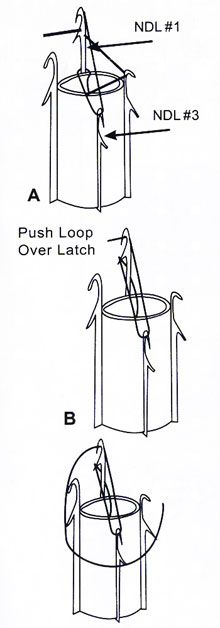
STEP 4A Continue turning the handle, pushing the yarn behind the fourth needle and continue turning the handle until the first needle catches the yarn again. Be sure the stitch slips below the latch(4). If it does not slip down on its own, push it below the latch using the top of the tapestry needle or your finger(B). STEP 5 Continue turning the handle slowly until every needle has caught the yarn. Pull down on the yarn coming out or the bottom of the machine every couple of turns at the beginning to make sure all the stitches have been formed. Soon the yarn will start to come out of the bottom of the tube. Move the clip up as needed. BINDING OFF Cut the yarn before it feeds into the guide and keeps turning the handle. The cording will drop through the center of the machine. Thread the tapestry needle with the end of yarn and thread it through all four loose stitches, then tighten to close. Weave the end of yarn into the cord. |
 |
SPIRAL LOOP FRPG
Beginning at lower edge, wind cording into a clockwise spiral, three loops (the 2nd forms the buttonhole), and end with another clockwise spiral
FISHTAIL FROG/BUTTON
Work as shown, pinning the outer loop in place. Work each subsequent loop inside the previous loop

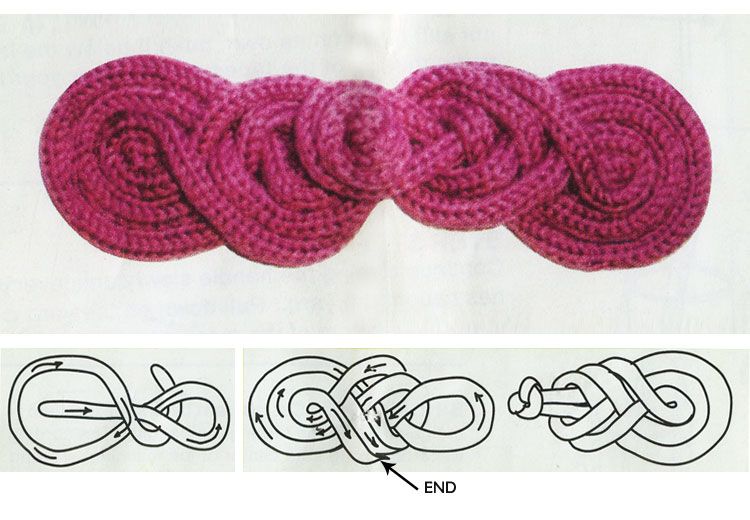
CELTIC STONEWORK KNOT
This knot can be of any size, from a 3'' diameter to a 12'' diameter.
Knit cording to the desired length.
Beginning and ending at the top, work in "under, over" motions to form an intertwined knot as shown.
Joint CO edge to BO edge with grafting stitch or simply tie and hide at the back.
TIP
When applying cording to a garment or other project, use sewing thread to best conceal the stitching.
