Mastering the Art of Sewing an Elasticated Waistband: A Step-by-Step Guide
Searching for a way to add comfort to your clothes and accommodate different body types? Learn how to sew an elasticated waistband. This guide gives you all the steps and tips needed to master this skill. From materials to advanced techniques, you’ll find everything you need here.
Key Takeaways
-
Gather essential materials like fabric, sewing machine, and tools before starting your elastic waistband project.
-
Choose the right type of elastic based on your fabric weight for comfort and durability, whether it’s braided, knitted, or woven.
-
Explore variations like double casing and paperbag styles to elevate your sewing projects and add unique touches to your garments.
Materials & Tools Needed
Before starting, gather the necessary materials and tools. Choose a quality fabric suitable for your project, such as lightweight cotton for a summer skirt or heavier knit for winter pants. You’ll need a reliable sewing machine, sharp scissors, pins, and a large safety pin for threading the elastic.
Also, have a measuring tape for accurate measurements, an iron for pressing seams, and a roomy table for laying out materials during cutting and sewing. These tools will help ensure your project runs smoothly and efficiently.
Understanding Elastic Waistbands
Elastic waistbands are a popular feature in many garments, including pants, skirts, and shorts. They provide a comfortable and secure fit, allowing for a range of motion and flexibility. Elastic waistbands can be made from a variety of materials, including cotton, polyester, and spandex. The width of the elastic waistband can vary, but it is typically between 1-3 inches (2.5-7.5 cm).
Elastic waistbands can be categorized into two main types: fold-down casings and applied casings. Fold-down casings involve folding the fabric allowance at the waistline to the inside and stitching it in place to create a casing. Applied casings, on the other hand, involve attaching a separate piece of fabric to the waistline to create a casing.
Elastic waistbands can be used in a variety of garments, including casual wear, activewear, and formal wear. They are particularly useful for garments that require a comfortable and secure fit, such as pants and skirts.
Choosing the Right Pattern
Choosing the right pattern is crucial. The type of elastic should depend on your fabric’s weight and desired stretch. For example, lightweight fabric pairs well with knitted elastic, while sturdier fabric benefits from woven elastic.
Braided, knitted, and woven elastics each serve unique purposes:
-
Braided elastic suits light-to-medium weight fabrics needing moderate stretch.
-
Knitted elastic is softer and more flexible, ideal for garments requiring gentler stretch.
-
Woven elastic is strong and firm, perfect for heavier fabrics needing more support.
Matching fabric with the appropriate elastic ensures comfort and durability. Once you’ve chosen the pattern and elastic, you can start cutting and sewing. This thoughtful selection process addresses many fit and comfort questions upfront.
Preparing the Waistband Casing
To prepare the waistband casing, you will need to add the width of the elastic, ease, and seam allowance to the waistline measurement. This will ensure that the casing is the correct size for the elastic waistband.
Cut out the pattern pieces and sew the garment side seams right sides together. Press the raw edge of the fabric under the seam allowance to the wrong side. Press again, the width of the elastic plus ease, and pin in place.
Use a ruler or measuring tape to ensure that the casing is the correct width. You can also use a sewing gauge to help you achieve a consistent width.
Assembling the Waistband
To assemble the waistband, attach a large safety pin to one end of the elastic and pull it through the entire casing. Use a ‘feeding’ motion to guide the elastic through the casing, making sure not to twist or bunch the fabric.
Once the elastic is fully inserted, pinch the tails together with the correct sides overlapping. Pull the tails out to create more room to sew them. Overlap the elastic by about 1 inch (2.5 cm) and sew back and forth to secure.
Stretch the waistband out to distribute the fabric evenly along the elastic. This will help prevent the waistband from becoming too tight or too loose.
Use a sewing machine to sew the waistband in place, making sure to backstitch at the beginning and end of the seam. You can also use a serger or overlocker to finish the seam.
Finally, topstitch the waistband to add a professional finish and prevent the elastic from twisting. Use a straight stitch and pull the elastic and fabric flat as you sew.
Basic Elasticated Waistband Technique
To create a basic elastic waistband that adjusts comfortably to your body, measure your waist where the waistband will sit, ensuring the measuring tape is snug but not too tight. Cut your fabric to be twice as wide as the desired finished waistband width, allowing for folding to create the elastic casing.
Fold the fabric band in half lengthwise and stitch the open edge, leaving a small gap for the elastic. Ensure the casing is at least a quarter inch wider than the elastic for even tension. Use a large safety pin or bodkin to thread the elastic through, adjusting it to gather the fabric evenly.
Secure the elastic ends by overlapping and stitching them together. Close the gap in the casing and ensure the fabric lies flat for a neat finish. This basic method forms the foundation for advanced techniques and variations.
Double Casing Elasticated Waistband
For a more structured and polished look, try a double casing elastic waistband. This technique involves sewing two parallel casings, allowing for separate adjustments and added flexibility. It’s ideal for elegant designs like dresses and skirts that require a refined finish.
Begin by sewing the first casing like a basic elastic waistband. Then, sew a second parallel casing beneath the first, ensuring both are wide enough for their respective elastics. Inserting elastic into each separately provides a more structured appearance and better control over fit.
Topstitching along the waistband edge secures the casings and enhances the garment’s overall aesthetic. This technique adds a touch of sophistication to your sewing projects.
Paperbag Style Elasticated Waistband
The paperbag style elasticated waistband is a trendy option that adds volume and detail to pants and skirts. Start by measuring your waist circumference and determining the desired fullness for the gathers. Cut your fabric with allowances for the extra fullness, making the top section wider to create the paperbag effect.
Fold the top edge of the fabric over and stitch it down to create the casing, ensuring it’s wide enough for the elastic. Insert the elastic, adjust to the desired tightness, and stitch the ends securely to finish the waistband. This creates the loose, gathered look of the paperbag style.
Whether making pants, skirts, or shorts, the paperbag waistband adds an elegant and fashionable touch to any garment you can wear while wearing pockets.
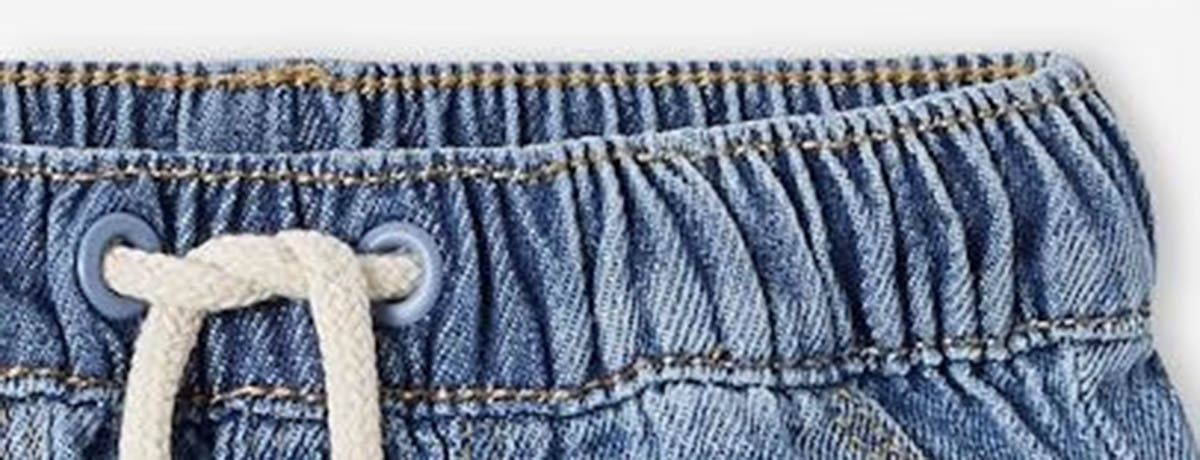
Adding a Drawstring to Your Elasticated Waistband
Adding a drawstring to your elastic waistband combines functionality with style. Begin by marking the placement of grommets or buttonholes on the front of your pants and reinforcing these areas with interfacing. Apply the grommets or buttonholes for threading the drawstring.
Create a casing by stitching above the buttonholes or grommets, leaving an opening for the drawstring. The elastic should match the wearer’s low waist measurement, while the drawstring needs extra length to be easily tied and adjusted.
Thread the drawstring through the casing, adjust to the desired tightness, and secure the ends. This method adds versatility, allowing for easy size adjustments and a personalized fit.
Tips for a Neat Finish
Achieving a professional and neat finish is crucial for any sewing project. Use a ruler and gauge for accurate measuring and stitching. Final adjustments may involve tightening or loosening the elastic for perfect comfort and gather.
Consider using a serger, overlocker, or zig-zag stitch to finish the waistband seam for a clean, durable edge. Marking the fabric with a fabric marker or chalk before cutting or sewing ensures precision and helps avoid mistakes.
Proper care of elasticated garments is also essential. Washing them in cold water and air drying helps maintain elasticity and prolongs their life. Additionally, storing these garments flat or hanging them can prevent elastic deformation.
Caring for Garments with Elasticated Waistbands
To ensure longevity, follow proper care instructions for garments with elastic waistbands. Wash in cold water using a gentle cycle to prevent damage to elastic fibers. Air-drying is preferable to using a dryer, as high heat can weaken the elastic.
Avoid using chlorine bleach on elastic garments, as it deteriorates fibers over time. Fabric softeners are also not recommended for spandex or elastic-containing fabrics, as they leave residues that attract bacteria and odors.
When storing elasticated clothing, ensure they are clean to prevent stains from setting during long-term storage. Following these tips will help maintain the fit and comfort of your elasticated waistbands.
Creative Variations and Projects
Elasticated waistbands offer endless opportunities for creative projects and unique styles. One popular variation is the double casing elasticated waistband, involving two separate casings for a more sophisticated look. This technique is perfect for elegant dresses and skirts.
The paperbag style adds a trendy touch to pants and skirts by introducing volume and detail. Adding a drawstring to an elasticated waistband enhances functionality and allows for easy adjustments, while adding a stylish element through design choices like buttonholes or grommets.
Experimenting with these variations can lead to unique, personalized garments. Whether making comfortable pants or an elegant dress, elasticated waistbands offer a versatile and fun way to express creativity.
Summary
Throughout this guide, we’ve explored various techniques and styles for sewing elasticated waistbands. From the basic method to more intricate designs like the double casing and paperbag styles, you now have the knowledge to create garments that are both comfortable and stylish. Adding elements like drawstrings can further enhance the functionality and personalization of your projects. Elasticated waistbands are adaptable to different body types, ensuring a comfortable and secure fit for everyone.
Remember, practice makes perfect. Don’t be afraid to experiment with different fabrics, elastics, and styles to find what works best for you. The versatility of elasticated waistbands allows for endless creative possibilities, so let your imagination run wild and enjoy the process of making unique and comfortable garments.
Frequently Asked Questions
What type of elastic should I use for lightweight fabrics?
For lightweight fabrics, go with braided or knitted elastic since they offer a gentle stretch without adding bulk. It's a great way to keep your project looking sleek!
How do I ensure my elastic waistband has even tension?
To keep your elastic waistband even, make sure the casing is wider than the elastic and distribute the fabric evenly as you thread it. This way, you'll avoid any twists and get that comfy fit!
Can I use a dryer to dry garments with elasticated waistbands?
You should air-dry garments with elasticated waistbands to keep the elastic fibers from getting damaged by heat. It’s just a safer bet!
How can I add a drawstring to my elastic waistband?
You can easily add a drawstring to your elastic waistband by creating a little casing for it. Just mark where you want your grommets or buttonholes, reinforce them, and then thread the drawstring through – it’s that simple!
What are the benefits of a double casing elastic waistband?
A double casing elastic waistband gives you a neater look while also providing extra comfort and support. It's perfect for achieving that polished vibe, especially in dresses and skirts.
